Thursday, July 31, 2014

How to Cut Washi Tape Perfectly & Easily Without Scissors!

Ever wonder how some people get their Washi perfectly lined up in a square or just cut so straight and not hanging out of the box or anything? I used to wonder too. Someone on the Facebook group-we love ec - asked this same question. And that's where I learned this clever trick!


All you will need is your Washi tape and your EC ruler! Or any plastic ruler or laminated edge. 

No scissors needed! Every time I use a scissor my tape ends up cutting diagonally!


Step 1: line up your Washi where you would like it


Step 2: place your ruler's edge to the line where you'd like to cut the Washi 

Step 3: hold your Washi close to the edge and pull upwards to rip it against the edge

Step 4: admire your perfectly straight cuts!

Hope that helps you out in decorating your pages quickly and easily!! 

Happy planning!

Tuesday, July 29, 2014

Free Quote Art Printable: Change your thoughts..

I absolutely love this quote and wanted to hang it on my wall above my desk, so I made it look extra cute! Hope you like this printable too!


Monday, July 28, 2014

Cleaning out my closet with thredUP!

So it's been my goal to just toss out all of clothes that I don't wear anymore. But I've been reluctant because I don't want to just get rid of it all. I am pretty attached to my clothes even though I don't wear more than 3/4 of it! I totally need to get rid of some clothes desperately. I have so many goals to just clean up my room and get rid of everything I am not using. So just recently I heard about thredUP, which is basically a thrift store but online! You can send them clothes and they may pay you back for it if they like anything!

What's a better way of cleaning out your closet than this. I don't feel as bad now because at least I might get something out of it, and it still doesn't cost me a thing. Instead of tossing it out I get a bag sent to me for free, fill it up, and send it off, also for free! The bag they sent me has a shipping label on it already! And if they like any of your clothes they will pay you for it! As for the rest, they will donate it for you! 


Check it out! Here's $10 in store credit: 

http://www.thredup.com/r/VN3DOC 

Happy shopping! 
P.S. If you join through my link, I'll get a $10 store credit too


Sunday, July 27, 2014

Daily Expenses Worksheet Printable

This should have been made with the Financial/Budget Printables, but I didn't think about it til now. I wanted a way where I can see all of my spending on one page and track all of my spending. I know it says Daily Expenses, but it's more of a check register as well to see what you also receive and your total. Before I was color coding all of my spending in the monthly view (here I wrote check marks in the color code category) and weekly view (where I usually just wrote where I spent the money and how much). But now I will probably continue with that as well as color code it in this worksheet, and I like that I can see what I am also getting in and how much I have left.

The free printable has the date, description, how much you spent, how much you received, the total, and if it was a need or want. Here is a free printable for you to track yours!

f you do end up using these I would love to see pictures. Tag me on Instagram @wenduhh_plans or #mswenduhhblog 

How to use this:

Date: the day that you spent/received money
Description: What you spent/received your money on, for example, "planner goodies at target"
Spent: Dollar amount that you spent
Received: if you received, dollar amount that you received
Total: the total amount that you have left in your checking/cash (you don't necessarily need to fill this in but it's a good way to see your total if you want)
Need: was this purchase necessary? Did you absolutely need it? Then place a check mark here!
Want: Was this just for fun, something that you just wanted to spend on? (this is a great way to see how much you actually spend on needs or wants)


Download Here:
A5
Personal
Pocket

Please do NOT share the actual file or file link. Instead please send your friends here to download my free printables, thank you.

Thanks for reading!

Friday, July 25, 2014

How to Make Erin Condren Squares Word File Download

Need images to get started on making your EC Squares, check out my previous blog post on it here!

Update: so today, July 27th, I was playing around with Microsoft word and opened a new "word publisher" document, and when I pasted tons of pictures (they were huge by the way), I was able to select all on there, but not in a regular word document. So there I selected it all, and changed all the sizes to 1.5" width  and 1.9" height. And it worked! It took really long and was super duper slowing down my computer and froze for a while though. But that's another way of doing it!


So after googling several ways on how I can adjust multiple images at once and not finding anything at all about that; I instead found this where you can make tables and paste pictures into it to make it a certain size.

It beats adjusting each picture one by one and typing 1.9 x 1.5 for every single picture!

Read on to see how I did it, or just skip steps 1-6 and start at Step 7 and download the file link below to start pasting your images and making your weekly squares for your ECLP!

Step 1:

Open Microsoft Word and set your margins to .5"
adjust your margins to "narrow" 0.5" to make the most use out of your sticker paper

Step 2:

Go to Tables and create a New Table that is 5x8
Go to tables and insert a new table
Make your table 5 columns by 8 rows (or more)

This is what the table will look like

Step 3:

Right click the table> table properties>options>adjust the borders all to 0"and also uncheck the box that says "automatically resize to fit contents". Then press OK. (don't worry steps 3-6 you will not have to repeat)


right click >table properties


click on options and adjust all margins to 0" and uncheck "automatically resize to fit contents"


Step 4: 

In the table properties box, click on Row, check specify height and change it to 1.9" exactly
Row: height 1.9"


Step 5: 

Then click on column, and check preferred width and change that to 1.5"
Column: width 1.5"

Step 6: 

Then click on cell and change the preferred width to 1.5" as well

Cell: 1.5"

Step 7:

 Finally copy your image, then go to edit>paste special (i recommend finding the shortcut for paste special, on my mac it's control, command and V on the keyboard)
copy your image from pinterest or..

find images from google images and right click and copy
edit>paste special or use keyboard shortcut as shown (control+command+V) This is on a Mac

Step 8:

 Paste it as a Picture then press OK
Click on Picture

Step 9:

The picture will fit into the box just click on it and drag it to resize to fit the box perfectly
before dragging to resize it
resized to fit box


Step 10: go to file>reduce file size to make the file smaller 
Step 11: save as PDF or word, whichever you prefer!
Step 12: print on sticker paper! Or print on regular paper, cut it all up, and use your sticker maker or adhesive of your choice to stick these beauties in your planner!

Or if you would like to just skip Steps 1-6 and just go straight to pasting your found images, then download this word file that I made that has the tables already set! Click Here

Please refer to the previous post for more on finding images and such. Thank you for reading!

How To Make Weekly Squares Stickers for Your Erin Condren Planner


Today 
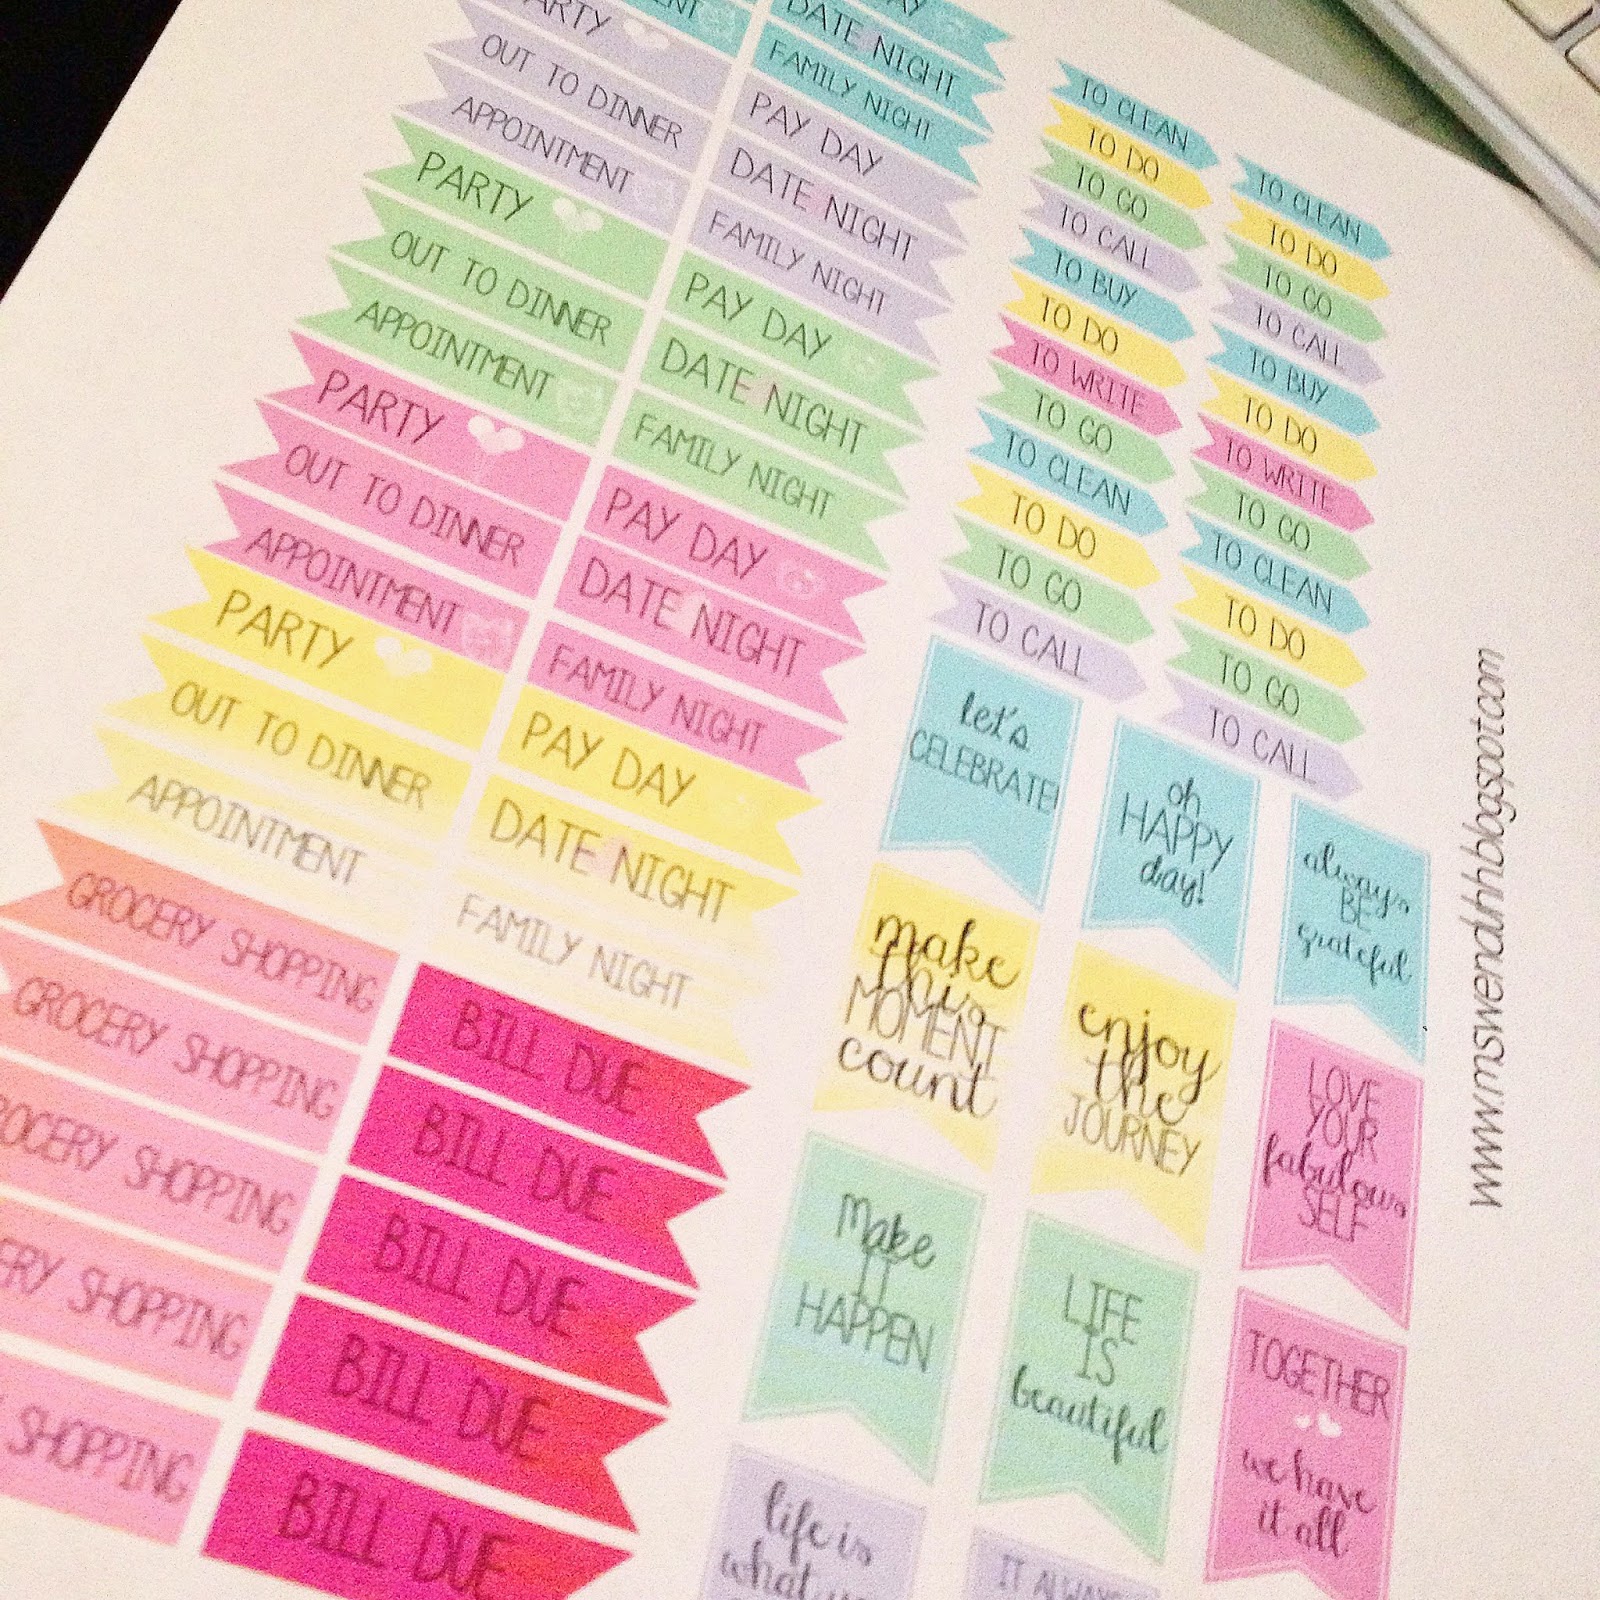
I am going to show you all how easy it is to make your own Erin Condren Weekly Square stickers. I can obviously keep providing you with new ones every now and then, but wouldn't it be nice to make your own, a full sheet of your favorite quotes? Or your favorite designs? We all don't live by the same quotes and all have different styles and tastes.


Down below is also a word file you can download... 


Many people in the We Love EC group on Facebook make them, that's why I thought it would be a good idea to make this blog post for my followers on Instagram who is not in the group. 


How To Make Erin Condren Weekly Squares: 


Step 1: find pictures of your favorite quotes or backgrounds and save them all to your computer. Or if you want you can just copy each one from the website directly and paste it into Microsoft word so you don't have to have all those files on your computer.

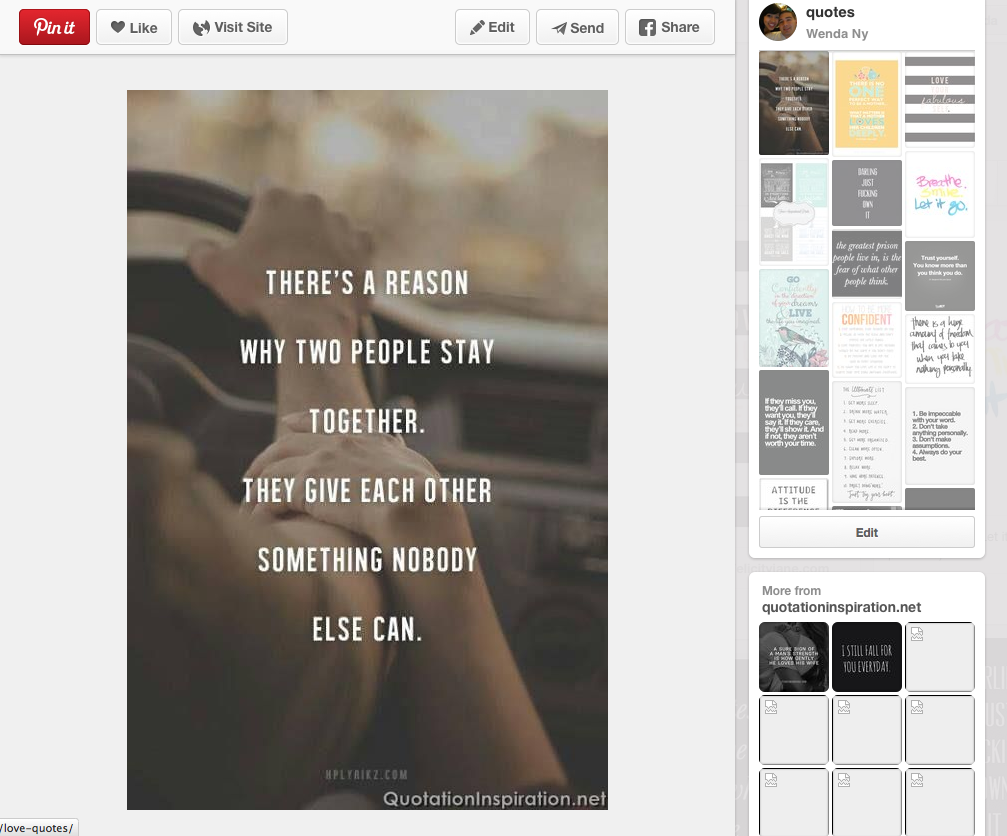
I use Pinterest for all of my pretty quotes images
 
I use Google Images search engine to find my patterned images


Step 2: Open up Microsoft word


Step 3: Paste the picture file into Microsoft word, and make sure the wrapping of the text is "in line with text" (as you add more pictures the pictures will be lined up perfectly next to each other, you want it close like that so you won't have to cut the extra white borders out. 

Copy the image you would like

and Paste it into Microsoft Word
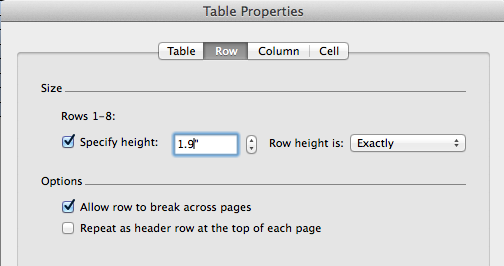
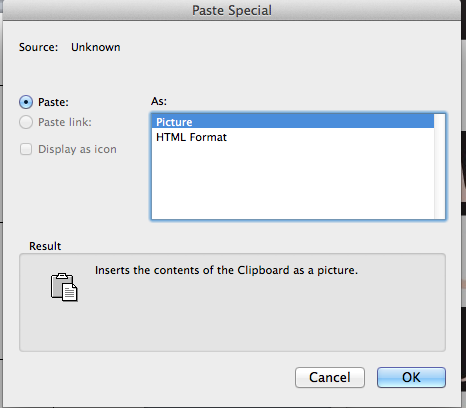


Step 4: Resize the picture by right clicking the image, click on format picture, click on resize image and change the  height to 1.9 inches and the width to 1.5 inches. Be sure to uncheck the box that says "lock aspect ratio"


The image will be big when you paste it in, to resize it right click>format picture...
 
This box will appear
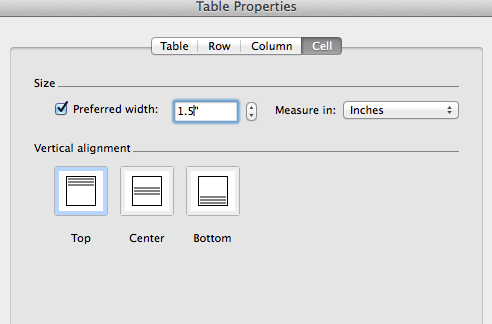
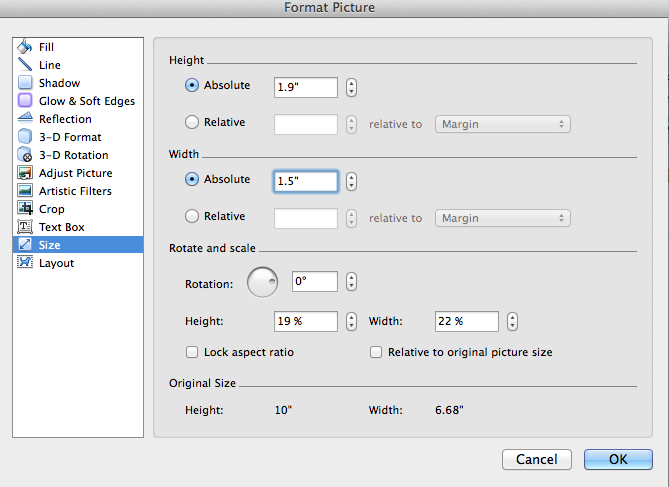
to change the size, uncheck the box"lock aspect ratio", and change the height to 1.9" and width to 1.5"


Step 5: Repeat for all images you want. This is the hard part, if any of you know of an easier way please let me know. But for now this is the only way I know how to make it.


Optional Step: If you want you can also put a border around each image so you can see where to cut exactly
  • just right click>format picture
  • then click on "line"
  • choose a color
  • and press okay


choose a color line for your border
This what it looks like with a border, again this is optional


Step 6: go to file>reduce file size to make the file smaller


Step 7: save as PDF or word, whichever you prefer!


Step 8: print on sticker paper! Or print on regular paper, cut it all up, and use your sticker maker or adhesive of your choice to stick these beauties in your planner!


Some great places to get quote images and backgrounds:


http://misstiina.com/blog/free/printables/


http://www.pinterest.com/wenduhh/quotes/


Google Images 

-backgrounds 

-cute backgrounds 

-patterned backgrounds 


Or make your own! 


Happy planning!


Wednesday, July 23, 2014

Planner Flags Stickers (Free Printable)

I just made these cute stickers to use in my Erin Condren planner! It includes occasions like parties, pay days, out to dinner, date nights, appointments, and family nights. The arrow flags are more for tasks like to clean, to do, to go, to call, to buy, and to write. And lastly the banner flags are just little quotes and such to decorate into our daily planner boxes.

f you do end up using these I would love to see pictures. Tag me on Instagram @wenduhh_plans or #mswenduhhblog 


The first column of flags to mark occassions and important days measures about 1.5" wide in order to fit inside the EC boxes perfectly.
pay day flag and grocery shopping flag in EC squares


The tasks stickers (to do, go, buy etc.)  measure about 1.3" to fit in the weekly goals sections, but you can also fit them inside the boxes as well.
here you can see the 2nd column flags on the side and in a box


The flag/banners are about 3/4" to just mark inside your weekly boxes as little reminders and inspiration for your days.
Here is a closeup of the banner

My weekly spread using these stickers, as you can see I am low on ink, cut them out, and simply used glue stick to put these into my planner.


In the file there are pre-written flags as well as blank ones so you can write your own planner tasks!

Planner Stickers (pre-written)
Planner Stickers (blank flags & banners)

Of course you don't need an erin condren planner to use these as you can totally use it in your filofaxes/kikki-k/ and any other planner you may have.

To Print:
Use full adhesive sticker sheets and cut out. Or print on regular paper and run them through your sticker maker, or simply use adhesive tape or a glue stick.

Cutting:
I recommend using a paper cutter and cutting each section first and going down the edges first then after that you can just use scissors to cut off the little triangular flag part.

Please do NOT share the actual file or file link. Instead please send your friends here to download my free printables, thank you.


DOWNLOAD HERE

Here is a bigger (in height) version as well
Download Big Version Here

Hope you like these!!

Saturday, July 19, 2014

How To Get A Scheduled Routine Going for Stay at Home Moms Plus Tips & a Routine Template Download


I have been trying so hard to get used to a scheduled routine with my boys. Without it I would not find the time to do anything. 

My Scheduled Routine Tips: 
    •  Set a timer or reminder on your phone. Timing is very important so that you don't spend too much or too little time on one thing
    •  Make a list of your day with the time you want to spend on each task. I listed everything as a reminder on my phone and set it to repeat every day. 
  • I hate when I spend too many hours on one thing too, you need to distribute your time well. 
      • A little each day is the best way 
      • That goes for cleaning, blogging and such. 
      • Every time I saw this I would finish up what I was doing and start this next task!
  •  As the day went on I would get a reminder but I had to keep adjusting the times a bit until it was just right 
    • For example I first had breakfast timed from 8:10 am to 8:45 am but cooking it and eating took way longer so I had to extend it and make my next task start later
  • Write it down. Writing things down or having a hard copy of your schedule makes it easier to remember.  

  • Here is a template of this routine schedule for you to download! (open with microsoft word publisher, and my font is penelope anne) 
    • It starts at 7AM and ends at Midnight, you can adjust the colors by highlighting the cells and then going to table layout on top and click on "shading"
    • You can also split the description boxes depending on your routine by "splitting the cell" 

  • Click here to download a printable version that you can fill in by hand.
      • Before this schedule I would lounge around all day and barely get anything done. 
    • Break it down: If you have a big project and you feel like it's impossible to tackle, just break it down into parts. Do things one at a time, instead of trying to multitask, and it'll make it much easier to get done!
    Additional notes:
    • You will never have time unless you make it
    •  When you have a routine set out like this and make it a daily habit it starts become second nature to you
    • Of course every day won't always go as planned, but like everything with practice you will get used to it. 
    • The hardest for me was making a habit out of doing my morning yoga and working out in the evening. 
      • Yoga only takes about 10 minutes yet I never took the time to do it! 
      • Hopefully now with my schedule it becomes a good habit that I learn. 

      • I also made this awesome chore chart for my son so it was like a triple reminder!
      • This morning I tried it out for the first time. At first he was playing with it, but I told that he can only put it up once he did those chores. 
      • Right away he looked at the pictures and said brush teeth? And I said did you brush your teeth? And he went to the sink and started brushing his teeth! 
      • Then he came back all excitedly and I said "now you can put it up!" And he did and I showed the star that said well done and he went on to do that for every task! 
      • I got this idea from several Pinterest posts Heres a great tutorial on it
      • I made my own printable using images from these sites:
        •  To download my version click below
            • just cut along the lines and glue or tape to cardstock paper (see below)

    Thanks for reading! I hope this helped you!

    -Wenda 

      LinkWithin

      Related Posts Plugin for WordPress, Blogger...